GolfBuddy Knowledgebase
-
How to use GB Course Manager (video)
URL : http://help.golfbuddy.com/sList.asp?searchproduct=26&searchcategory=6&seq=1617&page=1&searchtext= -
How to use WTX (video)
URL : http://help.golfbuddy.com/sList.asp?searchproduct=26&searchcategory=6&seq=1615&page=1&searchtext= -
How to use Bluetooth (video)
URL : http://help.golfbuddy.com/sList.asp?searchproduct=26&searchcategory=6&seq=1616&page=1&searchtext= -
Software Updates
Your GolfBuddy WTX unit has been pre-loaded with the latest firmware and world-wide course maps available at the time of manufacturing, so it’s ready to play right out of the box. For optimum performance and longer product life, we do recommend you register your unit and keep it updated with the latest versions of firmware. You can also add the latest course maps and updates for free once you have registered your unit. The instructions below will provide you with a step-by step guide on how to register and update your GolfBuddy WTX.
1. Downloading the GolfBuddy Management Software (GB Manager) to your computer:
• Please visit our website at www.golfbuddyglobal.com
• Click on the panel titled “Download GB Course Manager.” You will then see a screen with an option to choose either Windows or Mac based software.
• Click on the correct version for your computer. Once downloaded, you can run the application to install the GB Manager on your computer.
• Once completed, you will see a blue icon labeled "GolfBuddy World Course Manager" on your desktop that you will use to access the GB Manager once you have registered.
2. Creating a User ID:
• Open the GB Manager application by clicking on the blue icon on your desktop.
• You will see a Login Panel . Click on “Sign up for new user” at the bottom. This will bring up a panel for you to create your User ID and Password.
• Fill in all the details that are required ( indicated by " * " ). Please note the instructions regarding no Caps, Symbols, Spaces, & 4-15 character-long requirement. You will need to click the “Check Availability” to verify your selected User ID is valid and not already being used.
• Click “Submit” at the bottom of the form when finished.
• You have now created your User ID and Password... Make sure you write them down somewhere in case you forget them!
3. Registering your GolfBuddy WTX:
• Connect your GolfBuddy unit to a USB port on your computer using the USB cable provided with the unit.

Ensure that the instruction in section 2.3 should be followed.
• After a short time, your GolfBuddy unit should show an icon on the screen indicating it is connected to the computer.
You can disregard any driver download requests that your computer
• Click on the blue GB icon on your desktop and open the Login Panel.
may say is required.
• Enter your User ID and Password. You should now see a panel that indicates the GB Manager is searching for the device. After a short time, you will see “Connection Established”. At this stage, your unit is successfully registered to the account that you created and you will not be able to register your unit under a different account.
4. Updating your GolfBuddy WTX in three Steps
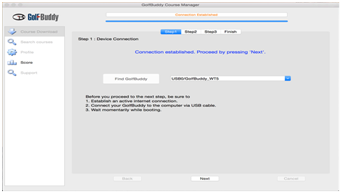
Step #1
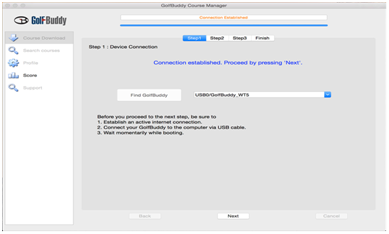
Once you get the “Connection Established” message, please click “Next” to proceed to Step #2: Firmware Update.
Step #2 : Firmware Update
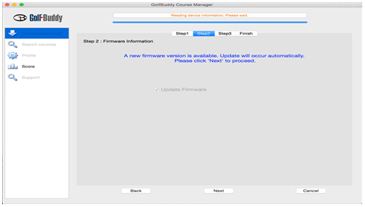
At step 2, click “Next” to install the latest firmware. If the firmware is already up-to-date, click “Next” to proceed to step3.
Step #3 :Course Download
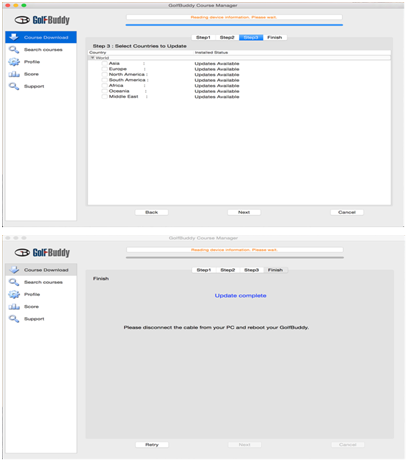
Select the countries that you would like to update and click “Next”. You will see a panel that asks you to “Overwrite” or “Newly Updated Only”(default option - already selected). Click “OK” to start the course update. Once all the courses have been downloaded you will receive a message “Update Complete”.Your GolfBuddy is now ready to go with the latest updates!
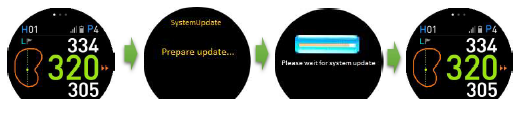
Step #4 : Completion of Firmware Update in WTX
To finish the firmware update on the WTX, the WTX watch will need to be disconnected from the computer after the message “Update Complete” is shown.
Soon after, the firmware update will start automatically, and it will take about 2 mins to finish the update. The firmware update of WTX will be finished by resetting it by itself.
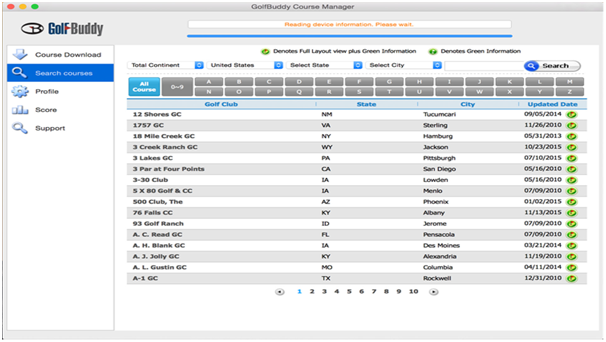
Updated Course Info
You can search courses by country, state, and city. You can also look up when the course was last updated.
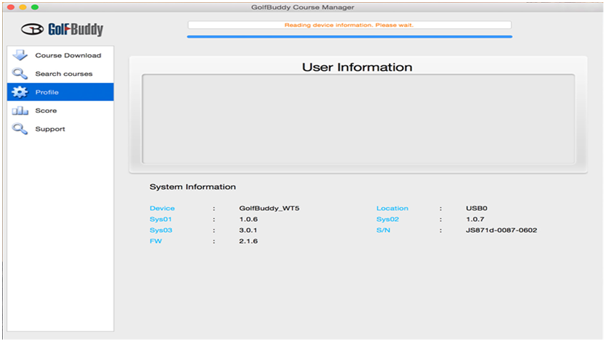
Profile Info
System Information for user’s WTX can be found under the profile tab.
URL : http://help.golfbuddy.com/sList.asp?searchproduct=26&searchcategory=6&seq=1594&page=1&searchtext= -
Settings
Bluetooth Settings

In BT settings, you can turn the bluetooth setting On or Off. When turning on bluetooth, the status bar will display the bluetooth icon at the top left side of the screen. The Visiblity can be turned off if you no longer want your WTX to be discoverable to other bluetooth enabled devices.
Display
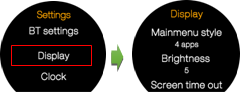
- Main menu style: Select how many Apps will be shown in the menu screen. Choose from 1 app or 4 apps.
- Brightness: Adjust the display brightness from level 1 to level 5. The default level is 3.
- Screen time out: Set how long the WTX will wait before the backlight turns off.
Clock
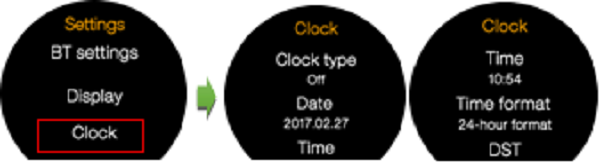
- Clock type: Select a watch face
- Date: Set the current date.
- Time: Set the current time.
- Time format: Select 12-hour format or 24-hour format.
- DST: Set the Daylight Savings option on/off.
Change the Watch Face
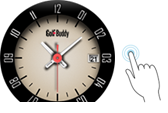
1. Touch and hold the Watch Screen, and swipe the screen or tap the arrow button to view available watch faces.
2. Tap the watch face to select it.
Sport
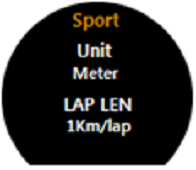
- Unit: Select imperial or metric units for running and cycling application.
- Lap length: Select your preferred lap length
- Satellite: This option will be removed from the latest firmware version.
Language
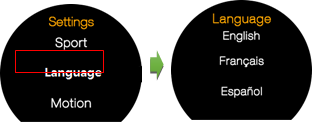
Select a display language for the WTX Supported Languages:
English, French, Spanish, Korean, Italian, German, Chinese.
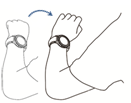
Motion
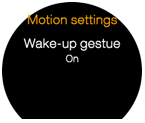
Set the WTX screen to turn on when you raise your arm, and turn off when you lower your arm.
Style
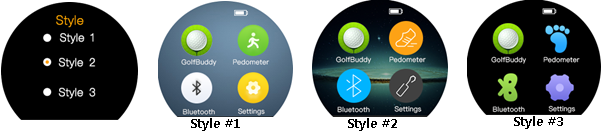
Switch the menu interface style.
Calendar
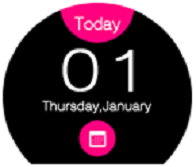
Depending on the month, the calendar may not be shown wholly because of the screen size
Notifier
View the dismissed notifications from your smartphone which is connected to the WTX. When you run the Notifier, a list of notifications dismissed earlier will be shown on the screen. Tap the specific notification in the list to view its detail, and it will automatically be removed from the list.
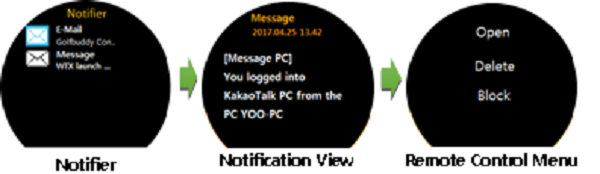
On the notification view, swipe the screen from the right and you can use the remote control menus for the selected App notification.
For more information about these menus, see section 2.7.
Reset
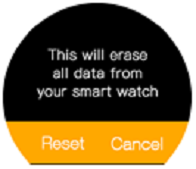
Reset to factory original Settings.
About
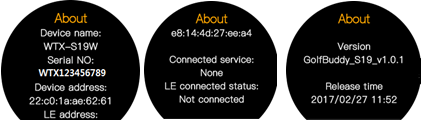
Product information
Serial Number, Bluetooth Address, Software Version, etc.
URL : http://help.golfbuddy.com/sList.asp?searchproduct=26&searchcategory=6&seq=1588&page=1&searchtext= -
Play Screen
By tapping anywhere around the distance number on the screen
(*refer to the red box in image below), you will be able to alternate Golf screens A,
B and C shown below.
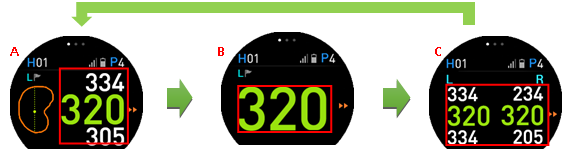
Dynamic Green view Big Number Mode Dual Green View
with Distances
- Dual Green View (C) will be available only when there are both of Left and Right Greens on your fairway.
- In case there are two greens on your fairway, you can quickly choose the green by
tapping the “L” and “R” beside the flag image in
the screen (A).
in
the screen (A).
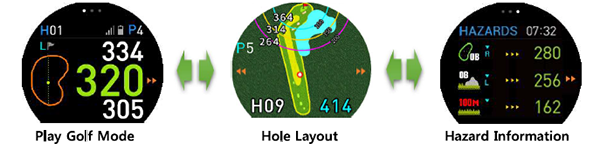
From the Play Golf Mode, tap the
 image or swipe the screen from right to left to view the Hole Layout and Hazard information.
Tap the image or swipe the screen from left to right to come back to the previous screen
URL : http://help.golfbuddy.com/sList.asp?searchproduct=26&searchcategory=6&seq=1575&page=1&searchtext= -
Wake-Up Gesture Feature
To turn on the screen, press
 button, or lift your wrist towards you as if you are looking at the time. To power off, press button or lower your arm. For more information on how to turn on on the Wake-Up Gesture option, please see section 4.2.6 in the manual.
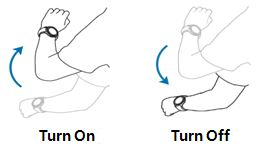
The screen may not turn on despite raising your arm or it may turn off too soon. In this case, it’s recommended that you lean your wrist little more towards you in order to turn on the screen.
- The screen turns off if the WTX is not used within a specified period of time. This can be changed under "Settings→ Display → Screen time out".
URL : http://help.golfbuddy.com/sList.asp?searchproduct=26&searchcategory=6&seq=1565&page=1&searchtext= -
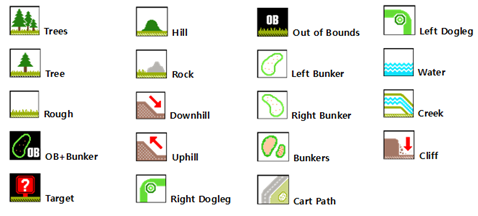
Hazards Icon Definitions
URL : http://help.golfbuddy.com/sList.asp?searchproduct=26&searchcategory=6&seq=1579&page=1&searchtext= -
Hole Layout
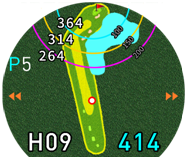
On the Hole Layout screen shown to the left, the red circle shows your current position. The layup arcs will also be displayed, indicating the distance from the layup arc to the pin. The three layup arcs will appear for par 4 or higher, and no layup arc will appear for par 3 hole. The distance layups are shown as 100, 150, 200 yards or meters from hole, following the current unit setting (refer to section 3.6).
※ Layup arc feature has been added as of April 2017. Please update your device if you do not have this feature.
A layup arc is especially useful when a golfer intends to hit the ball a shorter distance for a better position or to avoid a hazard or target. For example, if the WTX shows the white number of 264 at the left side of a 100 yard layup and the current unit setting is set to yards, it means you are standing at 264 yards from the 100 yard layup arc, and the 100 yard layup arc is 100 yards from the hole.
URL : http://help.golfbuddy.com/sList.asp?searchproduct=26&searchcategory=6&seq=1576&page=1&searchtext= -
Notifications
Before enabling notifications, you must connect your WTX to a compatible smartphone.
The WTX currently supports events, notifications, and messages from your smartphone.
When you receive a notification, the WTX will vibrate and the pop-up about the notification will appear on the screen.
Viewing Notifications
Tap “View” to view the notification’s detail and tap “dismiss” to view it later. The dismissed
notification can be viewed in Settings → Notifier.
Deleting Notification
Swipe the notificationview screen from right to delete the current notification.
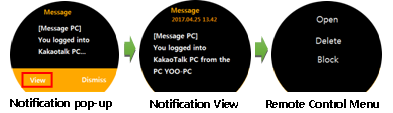
Remote Control Notification
Swipe the notification viewscreen from left for remote control notification.
- Open : View the notification detail in your smartphone.
- Delete : Delete the notification in your smartphone.
- Block : Block the current app notifications from next time.
You can re-enable the notification blocked in your smartphone. - The notification might appear on the screen of WTX periodically until you
“Delete” it in remote control notification menu or view it in your smartphone. - The remote control notification menuwill be dependent on the app notification,
for example, you can only see “Delete” in the specific app notification.
Managing Notification
You can use your smartphone to manage notifications that appear on your WTX.
- Apple Smartphone
Use the notification center settings on your smartphone to select which
notifications will appear on your WTX - Android Smartphone
Use the Settings → APP SETTINGS in the GolfBuddy app your smartphone
to select which notifications will appear on your WTX
Disabling Notification
Turn the Bluetoothoff to block all of notifications from your smartphone.
URL : http://help.golfbuddy.com/sList.asp?searchproduct=26&searchcategory=6&seq=1570&page=1&searchtext=